How To Create and Edit a Machine Agent
Learn to use the Highlighter Agent Designer
In this guide you'll create a new Machine Agent, add Capabilities, and connect the Capabilities together to make your Machine Agent ready to deploy.
Create a Machine Agent
The Agent Designer is the tool you use to build a new Machine Agent. It is a component within the Assessment Workflow.
- Navigate to the Assessment Workflow you want to add a Machine Agent to (create a new Assessment Workflow if you need).
- Navigate to the Steps tab of your new Workflow and click New Machine Step.
- Give your new Step a name and click Save Machine Assessment Step.
- Looking at your new Machine Assessment Step, click Edit on the top right of the page. You're now in the Agent Designer!
Add Capabilities
You should now be looking at a blank Machine Agent. By default it has two nodes: Pipeline Inputs and Pipeline Outputs. You can drag these around.
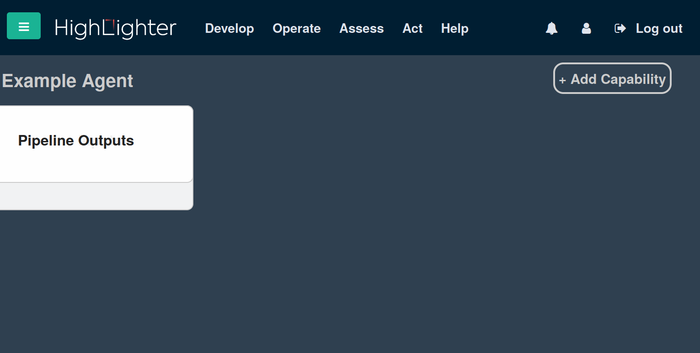
To add a Capability to the Machine Agent, click on Add Capability in the top right. You will see a list of available Capabilities to choose from.
There are two types of Capabilities:
- Built-In Capabilities: A set of pre-defined capabilities for common tasks (e.g.,
GroupEntities,SAM3). - Your Capabilities: A library of custom capabilities that have been published within your organization.
Note: To create and publish a new Capability that can be used here, see your account administrator.
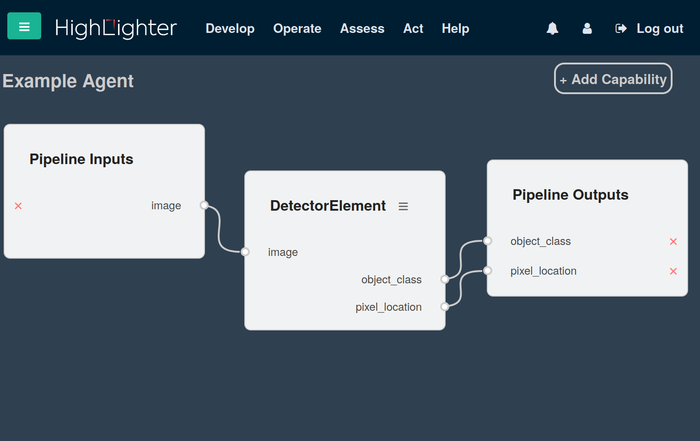
Select a Capability from the list to add it to the Agent as a node that you can drag around.
To add edges between the nodes, hover your mouse over the Pipeline Inputs node. An output port will appear on the right, which you can grab and drag towards the input of another node. Dropping the new edge on the input port of the other node will create the connection.
You can add edges to the Pipeline Outputs node by dragging the outputs of a Capability and dropping the new edge on the Pipeline Outputs node. These edges represent data that your Machine Agent will return.
The Pipeline Inputs and Pipeline Outputs nodes are special. You can add, remove, and rename their ports to define the data interface for your Machine Agent. Click on a port name to edit it, or use the controls to add and remove ports as needed.
Configure your Capabilities
Double-click on a Capability node, or click the hamburger icon next to its title, to bring up its detailed attributes and editable parameters.
You can configure three types of parameters for a Capability, which are edited in a JSON editor:
- Frame Parameters: Settings applied to each individual frame or data unit.
- Stream Parameters: Settings applied to the entire data stream.
- Deployment Parameters: Settings related to the deployment environment of the Capability.
Linking a Capability to a Training-Run Artefact
Capabilities can use trained model weights that are stored as Training-Run Artefacts.
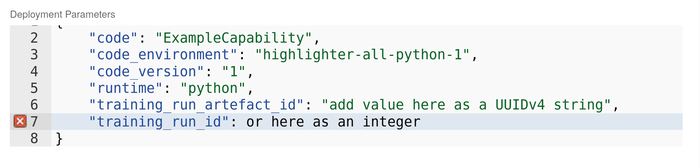
To override the artefact used by a Capability, change the "training_run_artefact_id" value in the Deployment Parameters when editing Capability attributes.
Alternatively, the "training_run_id" field can be set, and the Capability will use the most recent Training-Run Artefact uploaded to that Training Run.
The IDs of Training-Run Artefacts and Training Runs can be found via the "Training" page.
Removing a Capability
You can remove a Capability from your Machine Agent by clicking Remove Capability in this detailed view.
🎉
Congratulations! You have created and edited a Machine Agent in Highlighter.